T Bar Ceiling Grid Tips For Installation and Maintenance Guide?
The T-Bar Ceiling Grid is a crucial component in modern construction. Its design allows for quick installation and maintenance of ceiling systems. According to a report by the Construction Industry Institute, effective ceiling systems can enhance building performance by up to 20%. Installing a T-Bar ceiling grid properly ensures durability and aesthetic appeal.
However, not all installations meet industry standards. A survey by the International Council of Shopping Centers found that 30% of commercial spaces experience issues due to improper installation. This highlights the importance of following best practices. Each step in the installation process must be executed with precision.
Maintenance, too, is often overlooked. Routine checks can prevent costly damages. Many professionals recommend at least biannual inspections to ensure the grid remains secure. A well-maintained T-Bar ceiling grid not only looks good but also contributes to overall building safety. Proper guidance and reflection on previous installations can lead to improved outcomes.

Choosing the Right T Bar Ceiling Grid for Your Project
Choosing the right T Bar ceiling grid is crucial for any interior project. A well-selected grid can enhance both aesthetics and functionality. According to recent industry reports, around 20% of installation issues stem from improper grid selection. Therefore, understanding the types available is essential.
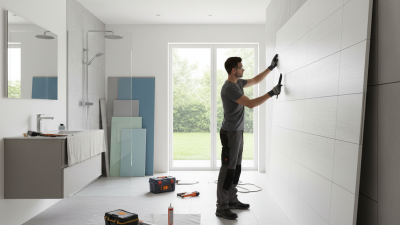
When selecting a T Bar ceiling grid, consider the material. Steel grids are durable but heavier. They require more support during installation. Aluminum grids are lighter and more resistant to corrosion. However, they can be more expensive. A recent survey found that 65% of contractors prefer aluminum for moisture-prone areas, like bathrooms or kitchens.
Consider the grid size, too. Standard sizes include 2x2 and 2x4 feet panels. However, customization options are available. Custom grids can add to project costs. Yet, they often improve overall design. Remember, the installation process can be challenging. It requires attention to detail. A miscalculation in grid layout can lead to uneven panels. A survey noted that 30% of installers faced alignment issues, so double-check your measurements.
T Bar Ceiling Grid Installation and Maintenance Guide
| Aspect |
Details |
| Material Options |
Steel, Aluminum, PVC |
| Standard Size |
2' x 4' and 2' x 2' |
| Grid Type |
Square Lay-in, Tegular, Revealed |
| Suspension System |
Main runner and cross tee |
| Installation Tips |
Ensure level suspension, plan layout, use appropriate tools. |
| Maintenance Recommendations |
Regularly clean, check for damages, replace as needed. |
| Aesthetic Options |
Variety of colors, patterns, and finishes. |
| Acoustic Performance |
Option for sound absorbing tiles and grids. |
Essential Tools and Materials for T Bar Ceiling Grid Installation
When installing a T Bar ceiling grid, having the right tools and materials is crucial. Ensure you have a measuring tape, level, and a chalk line. A utility knife will help with cutting the grid panels. You’ll also need a hammer, a T-square, and safety goggles. Having a step ladder nearby can simplify your work, especially for reaching high places.
Don’t overlook the grid tiles themselves. Choose panels that fit your design needs. It's vital to check for any damage or defects beforehand. Using a laser level can enhance accuracy and save you from potential issues later. Eclipse more traditional methods with modern tools, but sometimes old methods work better.
After gathering these essentials, take a moment to draft a layout plan. Lay it out carefully. Rushing this can lead to misalignments. Keep in mind the importance of venting and lighting fixtures. Rely on proper measurements to make adjustments after installation. It's frustrating to discover flaws later, but recognizing them early helps avoid costly fixes.
Step-by-Step Installation Process for T Bar Ceiling Grid
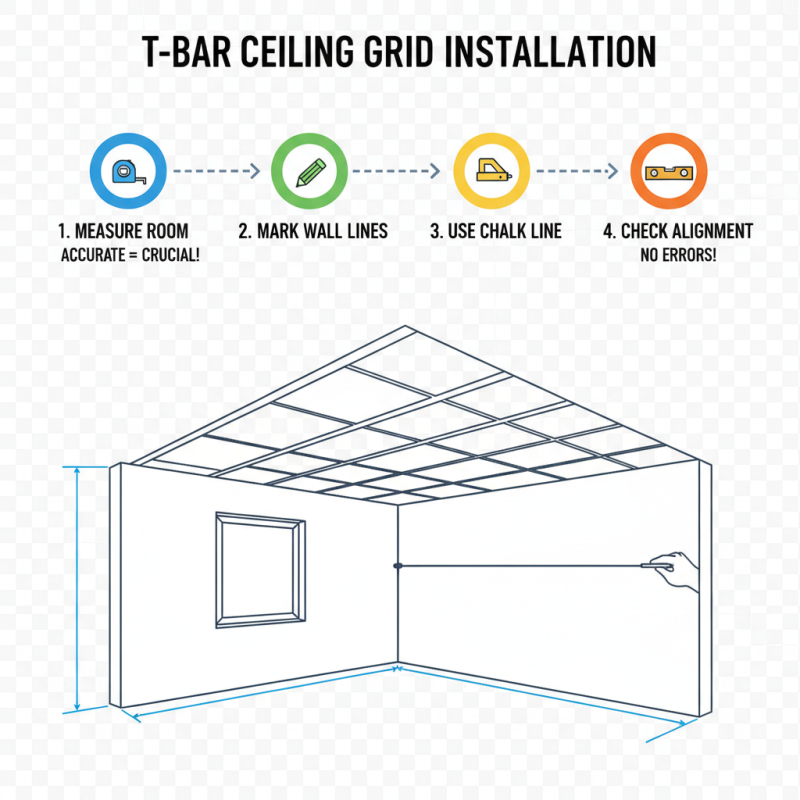
Installing a T Bar ceiling grid can seem daunting, but breaking it down into steps makes it manageable. Start by measuring the room to determine how many grids you will need. Accurate measurements are crucial. Don’t hesitate to take your time here. Mark the wall lines where the grid will hang. Use a chalk line for straight, even lines. If the marks are off, the entire grid will be uneven.
Next, install the main runners as per your measurements. These long metal bars will hold the cross tees and tiles. It’s vital to level them carefully. Use a level tool to ensure they are straight. If one is off, this will affect the entire ceiling. After securing the runners, start placing the cross tees. These fit into the main runners and create a grid pattern. Make sure they snap into place firmly. It’s easy to miss that one connection, so double-check!
Finally, insert the ceiling tiles into the grid. They should fit snugly. If any tiles are damaged or not fitting right, consider replacing them. The process may not be perfect on the first try. It might take adjustments to get it just right. The key is to be patient and detail-oriented throughout the installation process. Keep a reflective mindset, learning from any missteps along the journey.
Common Mistakes to Avoid During T Bar Ceiling Grid Setup
Installing a T Bar ceiling grid can seem straightforward, but many common mistakes can lead to costly errors. Accurate measurements are crucial. A report by the Ceiling and Wall Systems Association revealed that incorrect measurements account for about 30% of installation issues. Failing to measure twice can result in wasted materials and time. Always double-check your dimensions before cutting.
Another frequent mistake is improper leveling. If the grid isn’t level, tiles may not fit correctly. This misalignment can create gaps, affecting aesthetics and acoustics. Research indicates that about 20% of poor acoustic performance in office environments stems from installation flaws. Regularly use a level throughout the installation process. It might seem tedious, but it's essential for quality.
Additionally, neglecting adequate support can lead to further complications. Inadequate support can cause tiles to sag or even collapse. Data shows that improper support contributes to 25% of maintenance issues after installation. Ensure every grid section has the appropriate support. Inspect your work frequently, because it’s easier to fix issues before finishing the job.
T Bar Ceiling Grid Installation Mistakes
This chart highlights the common mistakes encountered during the installation of T Bar ceiling grids, with the frequency of occurrence represented in percentage terms.
Maintenance Tips for Long-lasting T Bar Ceiling Grids
When it comes to maintaining T Bar ceiling grids, regular checks are crucial. Dust and grime can build up over time, affecting both appearance and functionality. Clean the grids regularly with a soft cloth or a vacuum attachment. This prevents staining and prolongs the life of your ceiling.
Proper lighting can reveal issues that might go unnoticed during routine inspections. Look for any sagging tiles or misaligned grids. Address these problems immediately to avoid bigger repairs later on. Remember, a proactive approach is always better than a reactive one.
Humidity can lead to mold growth. If your space tends to get damp, consider using a dehumidifier. Additionally, check for leaks in your roofing or plumbing. Moisture problems can severely damage your T Bar grids. Regular maintenance ensures not only durability but also a pleasant atmosphere in your space. Don't overlook these small yet significant details.